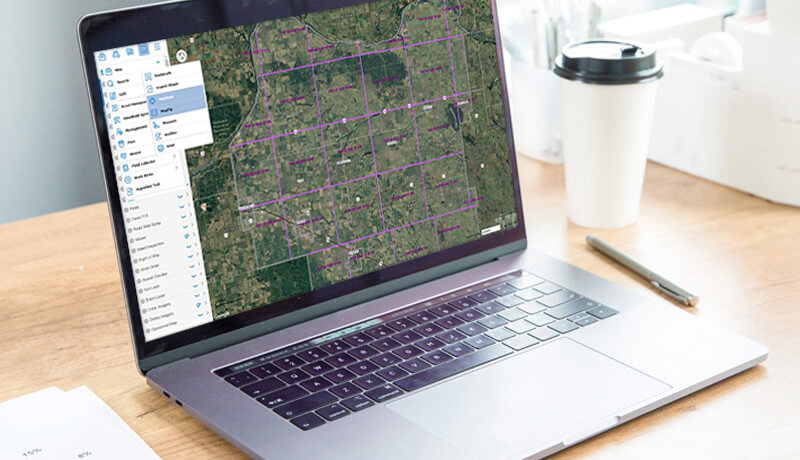
All vehicles that are equipped with AVL modems, will send their location and sensor information to MRF’s AVL data server via the cellular network. The AVL server provides the essential interface for all GPS tracking operations. MRF Web works as a portal to provide an advanced, user-friendly map interface for users to view, search and report vehicle location and operations data. There will be two data categories in the system:

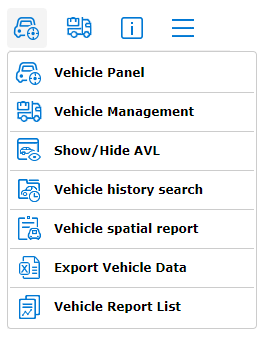
All the AVL functions are listed under AVL Toolbox:
Click on the Vehicle Panel
 button to open the vehicle list. When this panel is turned
on, Legend Panel is no longer showing. User can also click
on to switch between Legend Panel and Vehicle Panel.
button to open the vehicle list. When this panel is turned
on, Legend Panel is no longer showing. User can also click
on to switch between Legend Panel and Vehicle Panel.
Click on the Show/Hide Realtime Location
 button to view all the vehicles on map.
The main interface would look like the following:

The green arrow
 represents the direction of the active vehicle in real time.
For example, a vehicle that has a green arrow pointing West
in front indicates a vehicle is travelling West.
represents the direction of the active vehicle in real time.
For example, a vehicle that has a green arrow pointing West
in front indicates a vehicle is travelling West.
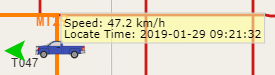
Real time data of vehicle state can be configured to be displayed as a map tip. In the following screenshot, the vehicle speed and timestamps were configured to show in map tips, which will automatically display when the user’s cursor is on the vehicle icon.

Click on the Vehicle Panel
button to open the vehicle list. The Vehicle Panel lists all
the vehicles assigned to the current web user. User can drag
the panel border to enlarge/shrink the table list for a
better view:
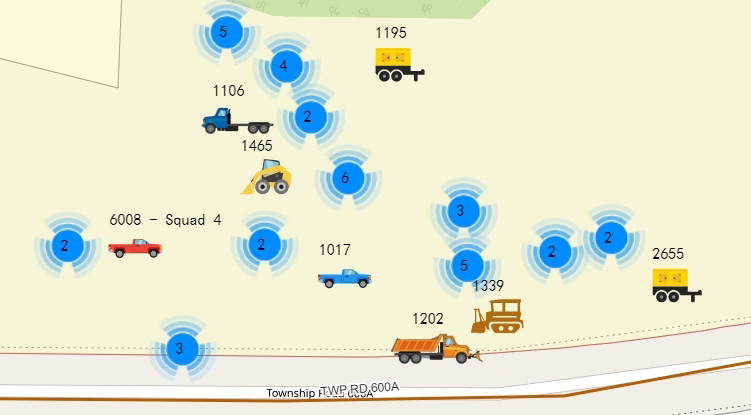
The vehicle list is color-coded to represent the status of each vehicle.
Check
 on to view all the vehicles in cluster mode. This groups up
multiple vehicles that are located within small area and
substitute the symbology of vehicles into clusters. Each
cluster has a number inside to represent the total number of
vehicles in that area. Uncheck it to view all the vehicles
on map.
on to view all the vehicles in cluster mode. This groups up
multiple vehicles that are located within small area and
substitute the symbology of vehicles into clusters. Each
cluster has a number inside to represent the total number of
vehicles in that area. Uncheck it to view all the vehicles
on map.
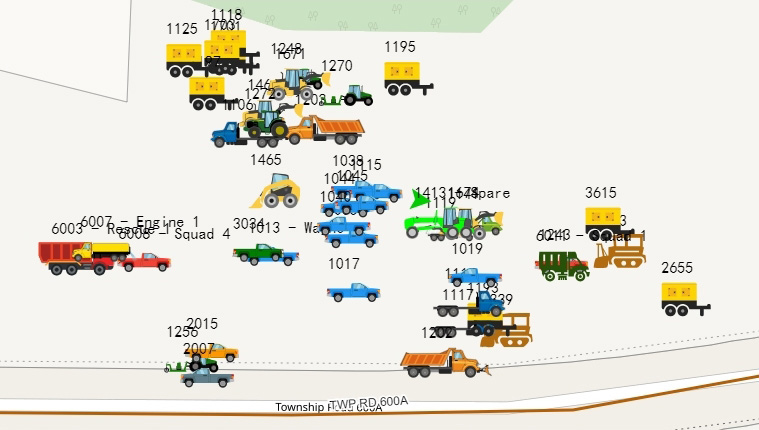
Cluster On
Cluster Off
Click on  button to refresh the current status of all
vehicles.
button to refresh the current status of all
vehicles.
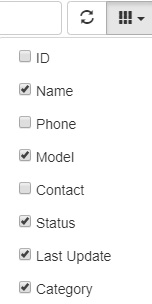
Click  on button to pick column names that you want to show
in the vehicle list table:
on button to pick column names that you want to show
in the vehicle list table:
User can also sort table by clicking on
 besides each column. For example, if you want to sort the
vehicle list table by Name, click on
besides each column. For example, if you want to sort the
vehicle list table by Name, click on
 to sort vehicle names from A to Z or from Z to A.
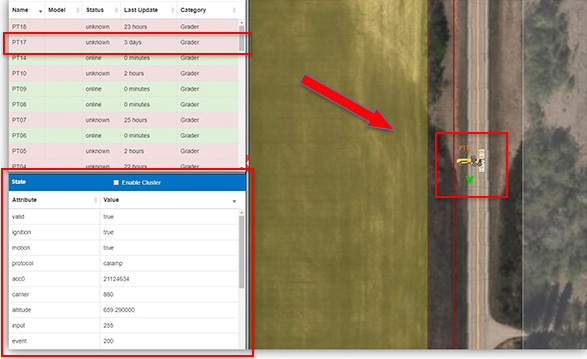
When user clicks on a vehicle row, the detailed attribute information about this vehicle will show up in the information box below, and the map will zoom to the current location of the vehicle.
User can create/edit a vehicle category in “My Vehicle List” to better manage and view the vehicle list. This list is only viewable to the current user account itself. Each user can customize their own personal vehicle list, other accounts users cannot see.
Click on
 button in the vehicle panel to open My Vehicle List dialog
box.
button in the vehicle panel to open My Vehicle List dialog
box.
The existing vehicle list are shown on the top. Click on any list to check/uncheck which vehicles are included in this list.
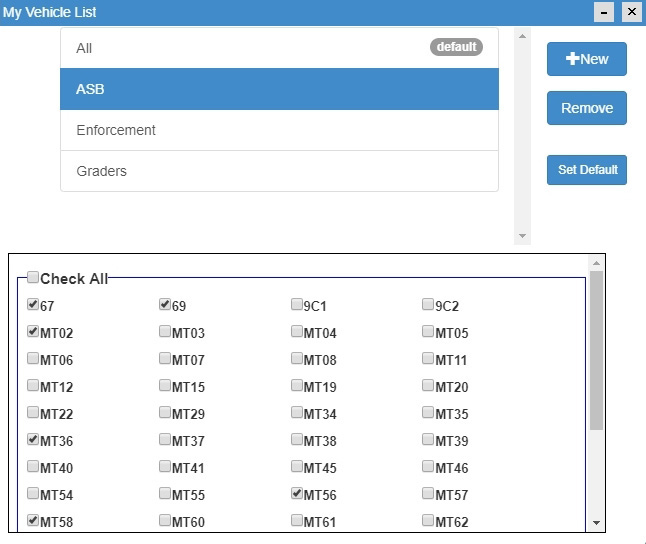
Click on
 button to create a new vehicle list.
Click on
 button to delete a vehicle list.
Click on
 button to set that list to be the default vehicle list to view
when user open up the Vehicle Panel.
button to set that list to be the default vehicle list to view
when user open up the Vehicle Panel.
Admin User can use Vehicle Management to create Departments and assign different symbology to vehicles.

Click on Vehicle Management
 button to open the Vehicle Management dialog window. The
Vehicle Management is color-coded based on the department in
order to differentiate them. All the vehicles are listed in
the Vehicle Management.
button to open the Vehicle Management dialog window. The
Vehicle Management is color-coded based on the department in
order to differentiate them. All the vehicles are listed in
the Vehicle Management.
Click on
 button to zoom into the current location of that vehicle.
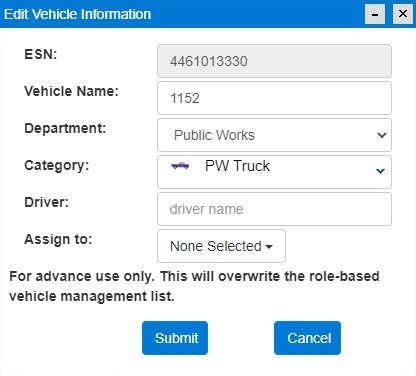
Click on
 button to edit the Department, Username, Category or Driver
information of that vehicle. The specific vehicle can be
assigned to a user. Please note that this is intended for
advance use only as it will overwrite the role-based vehicle
assignment of the appointed user. The user will have access
to only the vehicles assigned in this method.
button to edit the Department, Username, Category or Driver
information of that vehicle. The specific vehicle can be
assigned to a user. Please note that this is intended for
advance use only as it will overwrite the role-based vehicle
assignment of the appointed user. The user will have access
to only the vehicles assigned in this method.

Click on  button to update the mileage and engine hours reading from the vehicle.
Click on  button on the top left corner to open the Department Management dialog box. Admin user can create/edit/delete vehicle department here.

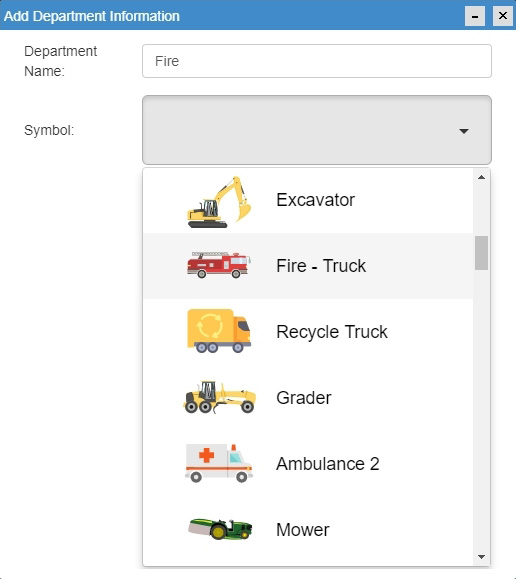
 button to create a new department. Input a Department Name and select a Symbol for this department, then click on “Submit” button to save.
In the Department Management dialog box:
Click on  button to assign authority to non-admin users to be able to view the vehicle department group when they login their accounts.
Click on  button to edit the department.
Click on  button to delete the department.

Each type of vehicle has its own icon shown on the map.
Click on  button on the top left corner to open the Category Management dialog box. All existing categories can be viewed here:
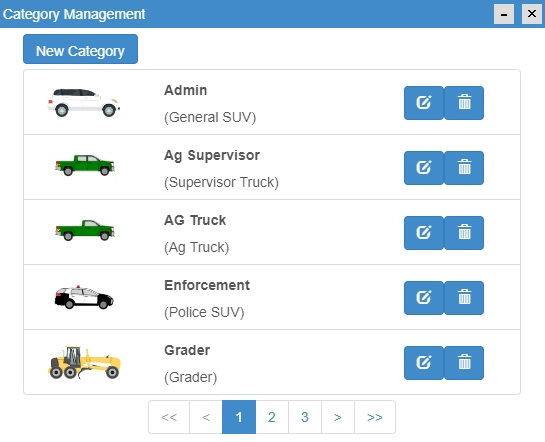
Click on  button to edit the category.
Click on  button to delete the category.

Click on  button to create a new category for vehicles. Input a Category Name and select a Symbol for this Category, then click on “Submit” button to save.
MRF Web provides users the capability of searching historical vehicle data on the map.
Vehicle History Search
 function allows user to search historical data by date, time, and vehicle name. “Display As Line” will create temporary line segments of the vehicle’s path within the queried window.

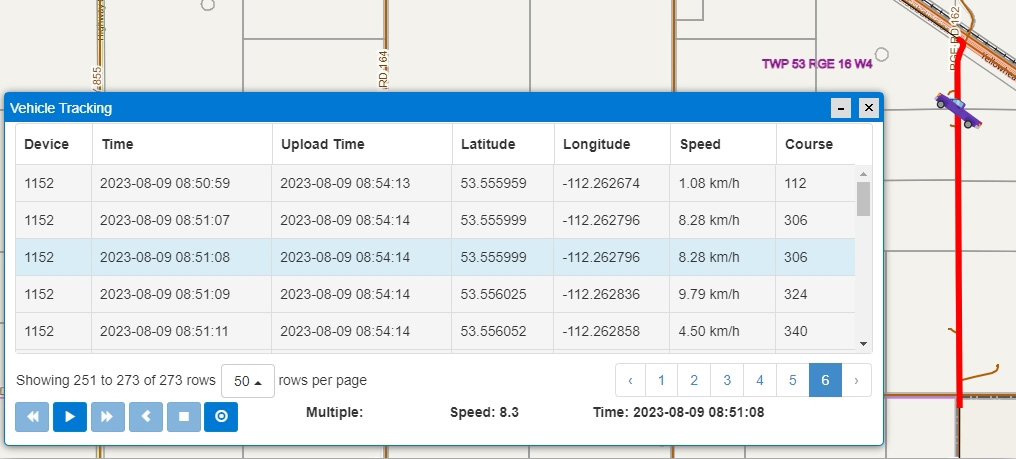
Once the search result is shown on the map, user can click on “Playback” option to watch the animated vehicle travel throughout the time frame specified by the user (please refer to the following screenshots). The speed of the vehicle is also displayed in the Vehicle Tracking results window.
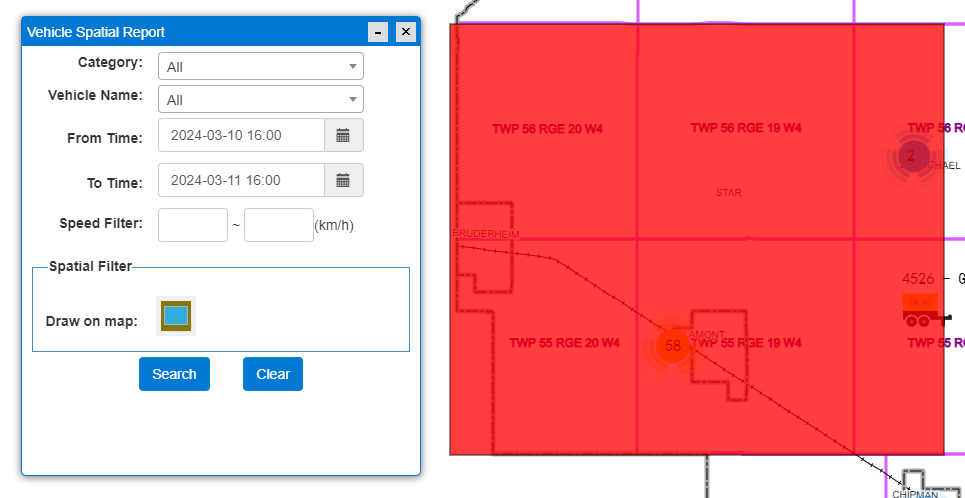
The Vehicle Spatial Report
 function allows user to search for historical vehicle data within an area of interest.
Traditional AVL systems usually only saves the vehicle location information as latitude and longitude values, but MRF Web treats tracking points as spatial data. Thus, advanced spatial operations are available.
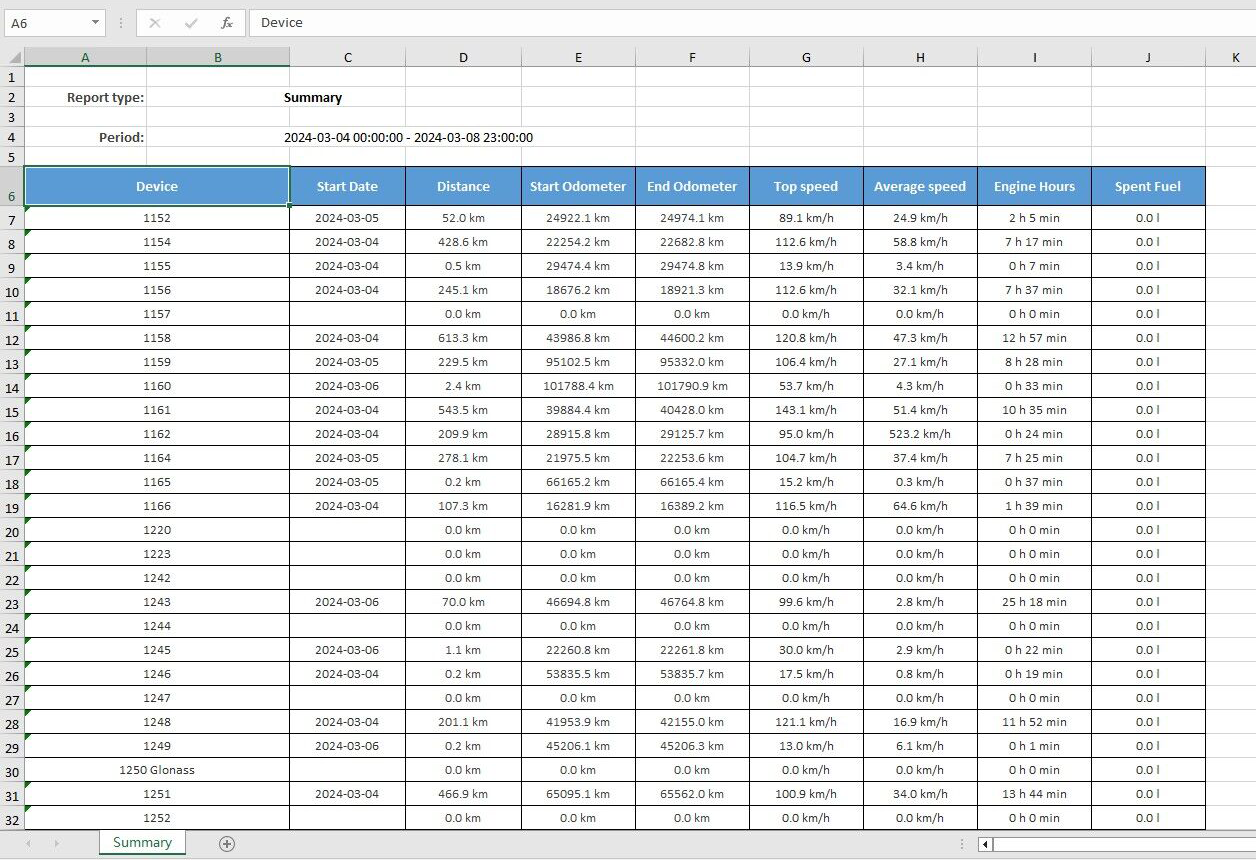
The summary results will be returned on screen as a table (please refer to figure below). Click on button for any individual search result to zoom to the selected vehicle location for the specified time-period on the map.
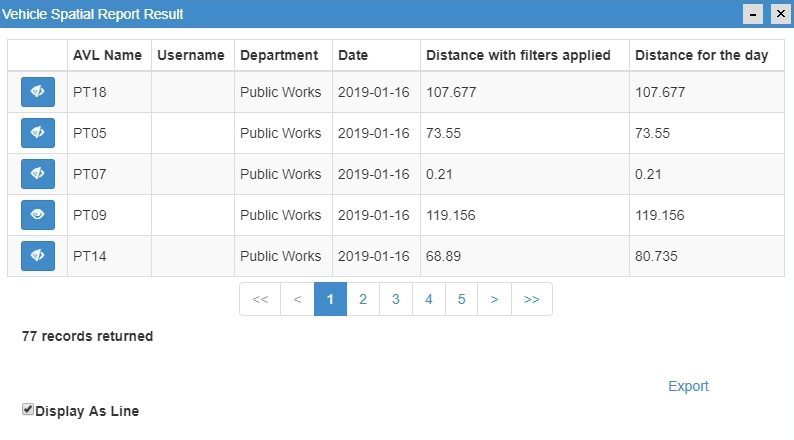
Click on Export Vehicle Data
 button to export all the search results into a report in csv format. The report includes total distance traveled for each vehicle within the specified timeframe and total travel distance of all the vehicles.
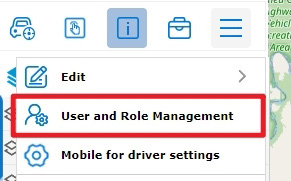
Every user is assigned a role, and each role is assigned to a specific set of vehicles. The vehicle assignment can be done via the User and Role Management interface.

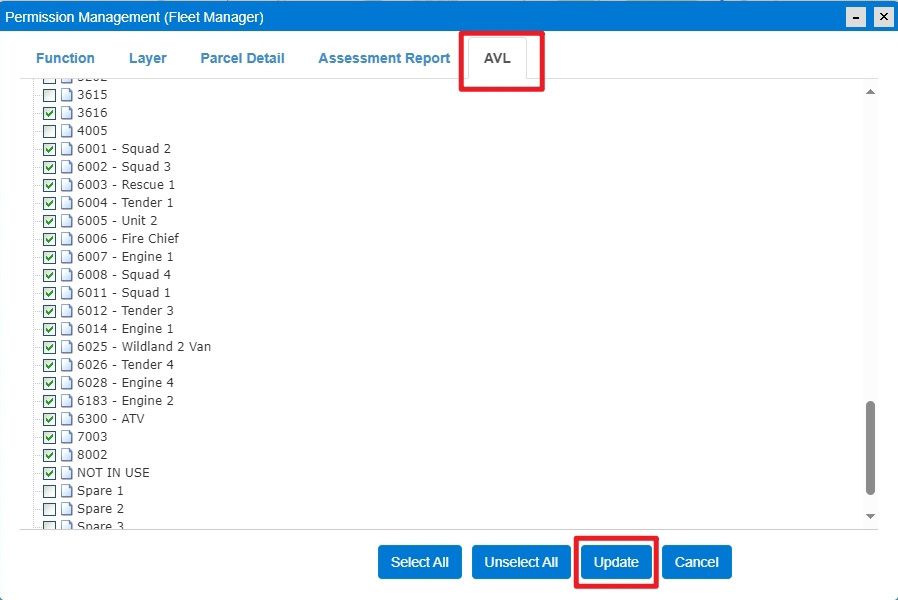
The Role Manager tap has the list of the roles within the organization. The vehicle assignment is under the Permission  sub-menu.
Under the Permission sub-menu, the AVP tab has the list of the vehicles with AVL integration. All checked vehicles are accessible to the role. If any change is made, it needs to be updated before the change is applied.
Please note that the role-based vehicle assignment will be overwritten if a vehicle is assigned to a user as stated in the section 3.3 Vehicle Management.